AD RMS uses rights policy templates to enforce a consistent set of policies to protect content. When configuring AD RMS, you need to develop strategies to ensure that users can still access protected content from a computer that is not connected to the AD RMS cluster.
You also need to develop strategies for excluding some users from being able to access AD RMS–protected content, and strategies to ensure that protected content can be recovered in the event that it has expired, the template has been deleted, or if the author of the content is no longer available.
Rights policy templates allow you to configure standard methods of implementing AD RMS policies across the organization.
For example, you can configure standard templates that grant view-only rights, block the ability to edit, save, and print, or if used with Exchange Server, block the ability to forward or reply to messages.
AD RMS templates support the following rights:
• Full Control. Gives a user full control over an AD RMS–protected document.
• View. Gives a user the ability to view an AD RMS–protected document.
• Edit. Allows a user to modify an AD RMS–protected document.
• Save. Allows a user to use the Save function with an AD RMS–protected document.
• Export (Save as). Allows a user to use the Save As function with an AD RMS–protected document.
• Print. Allows an AD RMS–protected document to be printed.
• Forward. Used with Exchange Server. Allows the recipient of an AD RMS–protected message to forward that message.
• Reply. Used with Exchange Server. Allows the recipient of an AD RMS–protected message to reply to that message.
• Reply All. Used with Exchange Server. Allows the recipient of an AD RMS–protected message to use the Reply All function to reply to that message.
• Extract. Allows the user to copy data from the file. If this right is not granted, the user cannot copy data from the file.
• Allow Macros. Allows the user to utilize macros.
• View Rights. Allows the user to view assigned rights.
• Edit Rights. Allows the user to modify the assigned rights.
OK, that’s just a little bit of explanation and now let see how can you as a Server Admin configure the ADRMS Rights Policy Templates,
I will continue from my previous deployment https://mizitechinfo.wordpress.com/2013/09/07/simple-guide-installing-and-configuring-ad-rms-in-windows-server-2012-r2-part-1/…
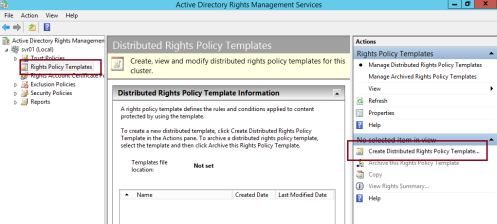
1 – On the SVR01 server, open Active Directory Rights Management Services console, then click Rights Policy Templates node and then in the Actions pane, click Create Distributed Rights Policy Template…
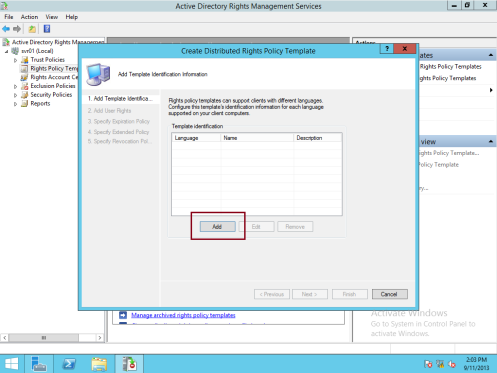
2 – In the Create Distributed Rights Policy Template Wizard box, on the Add Template Identification information box, click Add…
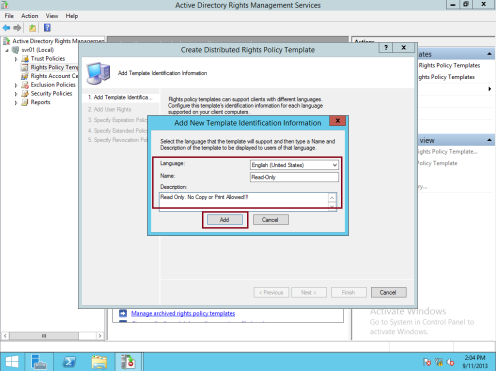
3 – On the Add New Template Identification Information box, enter the following information and then click Add and click Next to proceed…
— Language: English (United States)
— Name: ReadOnly
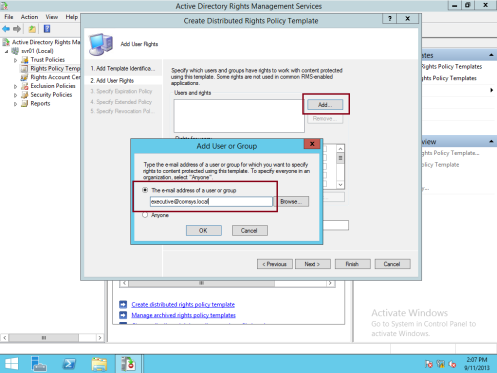
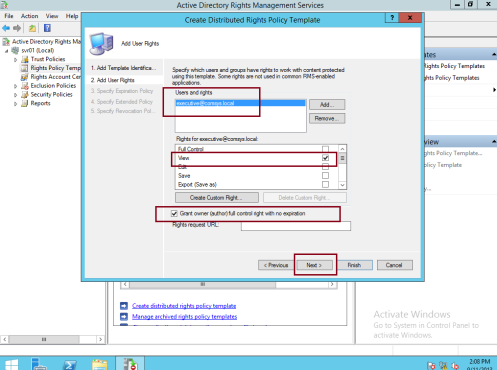
4 – On the Add User Rights box, click Add, then on the Add User or Group page, type executives@comsys.local and then click OK to proceed…
5 – When executives@comsys.local is selected, under Rights, click View. Verify that Grant owner (author) full control right with no expiration is selected, and then click Next…
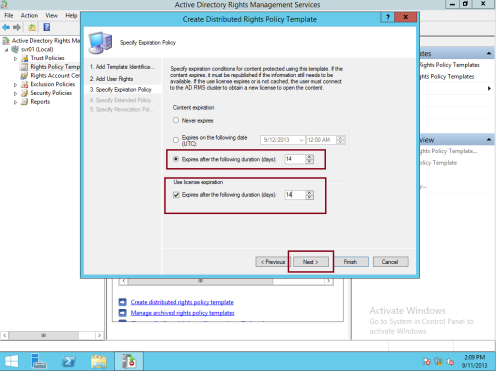
6 – On the Specify Expiration Policy box, choose the following settings and then click Next:
— Content Expiration: Expires after the following duration (days): 14
— Use license expiration: Expires after the following duration (days): 14
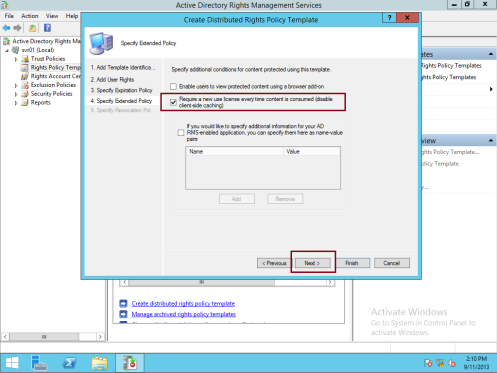
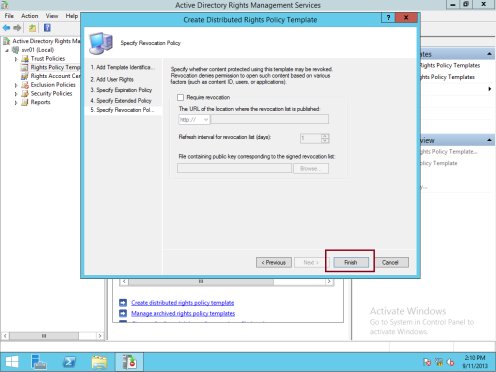
7 – On the Specify Extended Policy box, click Require a new use license every time content is consumed (disable client-side caching), click Next, and then click Finish…
Next step, lets configure the rights policy template distribution…
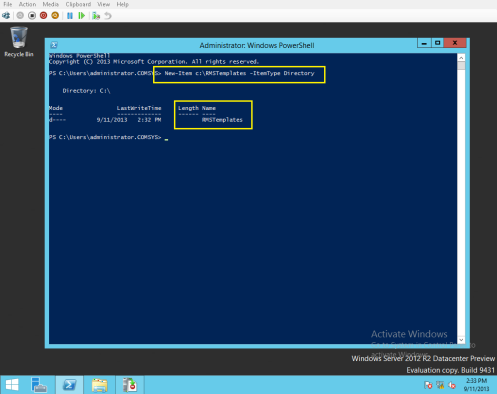
8 – On the SVR01 Server, open Windows PowerShell, and type : New-Item c:\RMSTemplates -ItemType Directory
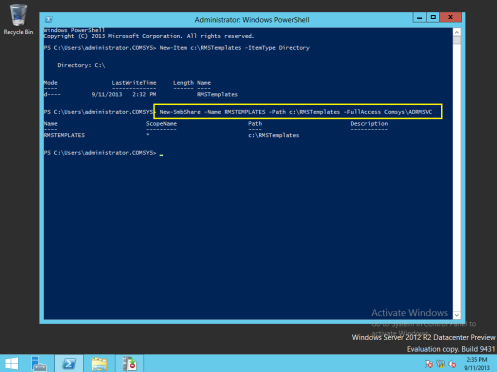
9 – Next, type New-SmbShare -Name RMSTEMPLATES -Path c:\RMSTemplates -FullAccess Comsys\ADRMSVC
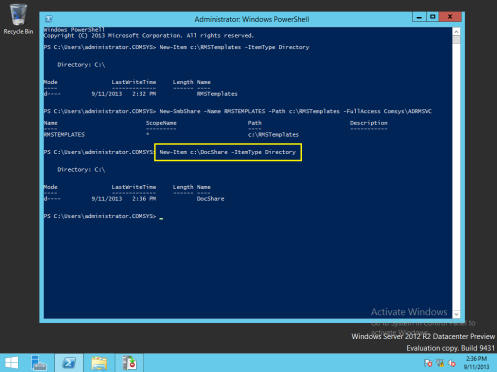
10- Next type : New-Item c:\DocShare -ItemType Directory
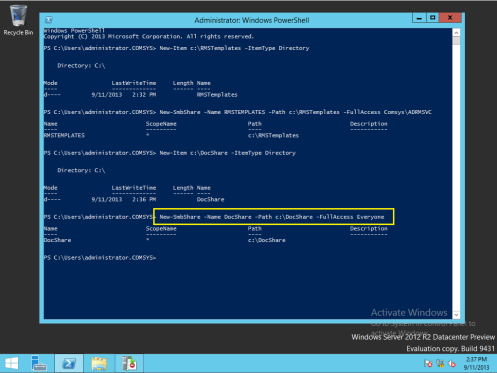
11 – Next type : New-SmbShare -Name docshare -Path c:\DocShare -FullAccess Everyone
12 – Exit PowerShell and open Active Directory Rights Management Services console.
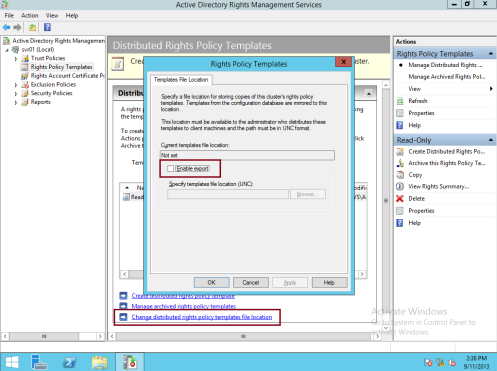
On the ADRMS console, click the Rights Policy Templates node, and in the Distributed Rights Policy Templates area, click Change distributed rights policy templates file location, then in the Rights Policy Templates dialog box, click Enable Export…
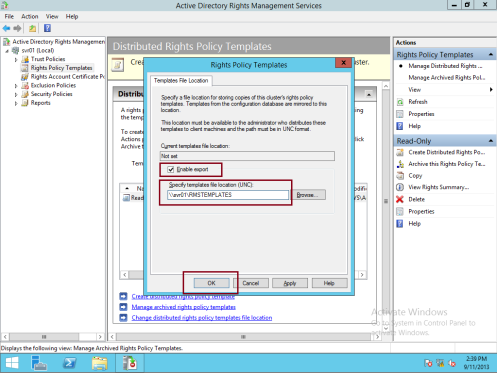
13 – Next, in the Specify Templates File Location (UNC), type \\svr01\RMSTEMPLATES, and then click OK…
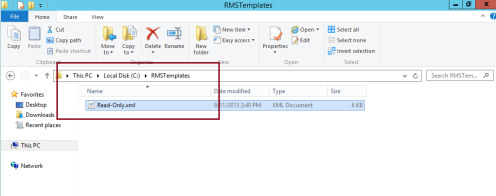
14 – Next, open Windows Exporer and navigate to the C:\rmstemplates folder, and verify that ReadOnly.xml is present…
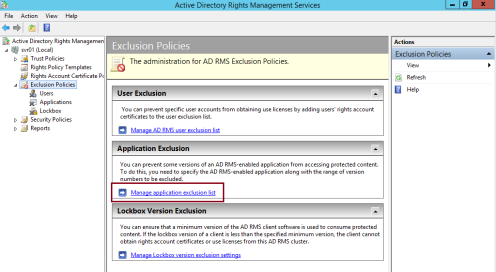
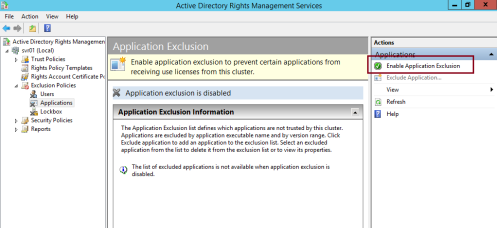
15 – Next, on the ADRMS Console, click the Exclusion Policies node, and then click Manage application exclusion list…
16 – In the Actions pane, click Enable Application Exclusion…
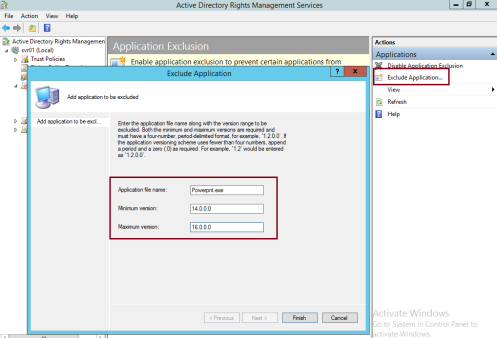
17 – In the Actions pane, click Exclude Application and enter the following information, and then click Finish:
— Application File name: Powerpnt.exe
— Minimum version: 14.0.0.0
— Maximum version: 16.0.0.0
— Minimum version: 14.0.0.0
— Maximum version: 16.0.0.0
Orait, we done for now, we have successfully configured AD RMS templates.. remember that we still have long to go to complete our ADRMS configuration.
Wait for my next post, part 3.. which is AD RMS Trust Policies implementation. :-)

No comments:
Post a Comment