This is my Part 2 of 7 on NAP, which is Configure Health Policies, before we start, we need to clear about what is Health Policies all about…
Health policies consist of one or more Security Health Validators and other settings that you can use to define client computer configuration requirements for the NAP-capable computers that connect to your network.
Lets get started, to configure health policy, log in to your NPS server, in my case i use my OSI-NPS server…
1 – Open Server Manager, Click Add roles & features…
2 – On the Before you begin interface, click Next…
3 – On the Select installation type interface, choose Role-based 0r features-based installation and then click Next…
4 – On the Select destination server interface, click Next…
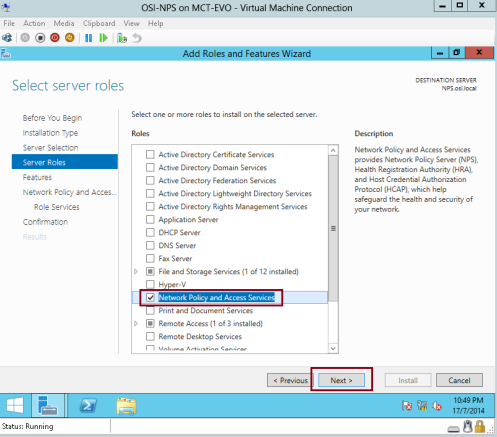
5 – On the Select server roles interface, select the Network Policy and Access Services check box and click Next to proceed…
6 – On the Select features, click Next…
7 – On the Network Policy and Access Services interface, click Next…
8 – On the Select Role Services interface, verify that you tick Network Policy Server and then click Next…
9 – On the Confirm installation selections interface, click Install…
10 – Verify that the installation was successful, and then click Close…
11 – Next, open Server Manager, Click Tools and then click Network Policy Server…
12 – On the Network Policy Server console, expand Network Access Protection, expand System Health Validators, expand Windows Security Health Validator, and then click Settings, on the right pane double-click Default Configuration…
13 – On the Windows Security Health Validator interface, click Windows 8/Windows 7/Windows Vista tab, clear all check boxes except the A firewall is enabled for all network connections check box, and then click OK.
14 – In the navigation pane, expand Policies, right-click Health Policies, and then click New…
15 – In the Create New Health Policy interface, in the Policy name box, type OSI-Compliant, then in the Client SHV checks box, verify that Client passes all SHV checks is selected, and then under SHVs used in this health policy box, select theWindows Security Health Validator check box then click OK…
16 – Next, repeat the previous step but this time for OSI-NonCompliant, right-clickHealth Policies, click New…
17 – In the Create New Health Policy interface, in the Policy Name box, type OSI-NonCompliant, then in the Client SHV checks box, select Client fails one or more SHV checks, under SHVs used in this health policy area, select the Windows Security Health Validator check box and then click OK…
18 – Lastly, please verify that under Health Policy we have 2 Policy name…


No comments:
Post a Comment