Hi all, almost a week I busy with my class and some small matters to solve. .. now I’m back… today lets go through a simple guide on how to Install and Configure AD RMS in Server 2012 R2.
** For those who subscribe to my blog, please be aware that certain step by step & simple guide needs more than few parts to be completed, this is because most of the Windows Server 2012 require details steps to complete, so please be patient.
Before we start, lets see what’s actually ADRMS all about?
In a nutshell, AD RMS is an information protection technology that is designed to minimize the possibility of data leakage.
Data leakage is the unauthorized transmission of information – either to people within the organization or people outside the organization – who should not be able to access that information.
AD RMS integrates with existing Microsoft products and OS’s including Windows Server, Exchange Server, SharePoint Server, and the Microsoft Office Suite.
AD RMS can protect data in transit and at rest. For example, AD RMS can protect documents that are sent as email messages by ensuring that a message cannot be opened even if it is accidentally addressed to the wrong recipient.
So, when to use ADRMS?
For example, you Finance Manager copies a spreadsheet file containing the compensation packages of an organization’s executives from a protected folder on a file server to the Manager’s personal USB drive. During the commute home, the Manager leaves the USB drive on the train, where someone with no connection to the organization finds it. Without AD RMS, whoever finds the USB drive can open the file. With AD RMS, it is possible to ensure that the file cannot be opened by unauthorized users.
Well, that’s just a few point on the ADRMS, for more information, please browse to http://technet.microsoft.com/en-us/windowsserver/dd448611.aspx .. I also running AD RMS class every months with fully hands-on lab, please log in to http://compextrg.com/ for schedule.
Orait, enough said.. lets get our AD RMS up & running.. on this 1st part, please be aware that this is only will cover Install and Configure, I will continue with AD RMS Templates configuration in the future, for those who have little knowledge on the AD RMS, please go through the technet to get more ideas on what is actually AC RMS…
For this Demo, as usual I still be using my existing small Infra which is DC01.comsys.local and SVR01.comsys.local…
1 – Lets start by creating ADRMS service account on Domain Server (Service account – Microsoft recommends using a standard domain user account with additional permissions. You can use a managed service account as the AD RMS service account).

2 – On DC01 server, open Active Directory User & Computers and create new OU call Service Accounts…


3 – Next, create new user call ADRMSVC with complete password…


4 – Next, create new Group in Users container call ADRMS_SuperUsers and create another group call Executives…


5 – Next, add few users to Executives group, for this Demo I choose my 4 of my Marketing users to join Executive group…


6 – Next, still on the DC01 Server, open DNS Manager and add new Host call adrms with SVR01 IP address, On the DNS Manager, right click Comsys.localand click New Host (A or AAAA)…

7 – In the New Host box, enter the following information, and then click Add Host :
– Name: adrms
– IP address: 10.10.0.30
click OK, and then click Done…


Orait, we now successfully add new ADRMS users & groups to AD and also configure DNS so that new ADRMS resource record created.
8 – Next, log in to SVR01.comsys.local to start Install and configure the AD RMS server role…
Open Server Manager, click Manage, and then click Add Roles and Features, in the Add Roles and Features Wizard, click Next 3 times…

9 – Then click Next 4 times…

10 – Next, click Install to proceed…

11 – Click Close when installation successful…

12 – Next, on the All Servers Task Details page, click Perform Additional Configuration…

13 – In the AD RMS Configuration: SVR01.comsys.local box, click Next…

14 – On the AD RMS Cluster box, click Create a new AD RMS root cluster, and then click Next…

15 – On the Configuration Database box, click Use Windows Internal Database on this server, and then click Next to proceed…

16 – On the Service Account page, click Specify, then in the Windows Security box enter ADRMSVC as a Username and enter the password, then click OK and Next…


17 – On the Cryptographic Mode box, click Cryptographic Mode 2, and then click Next…

18 – On the Cluster Key Storage box, click Use AD RMS centrally managed key storage, and then click Next…

19 – On the Cluster Key Password box, enter the password and then click Next…

20 – On the Cluster Web Site box, verify that Default Web Site is selected, and then click Next…

21 – On the Cluster Address box, provide the following information, and then click Next to proceed :
– Connection Type: Use an unencrypted connection (http://)
– Fully Qualified Domain Name: comsys.local
– Port: 80

22 – On the Licensor Certificate box, type Comsys ADRMS, and then click Next…

23 – On the SCP Registration box, click Register the SCP now, and then click Next to proceed…

24 – Click Install, and then click Close when installation successful…


25 – Next, open Internet Information Services (IIS) Manager…

26 – In Internet Information Services (IIS) Manager, expand Sites\Default Web Site and click _wmcs, then under /_wmcs Home, double-click Authentication…

27 – Then right-click Anonymous Authentication and click Enable…

28 – In the Connections pane, expand _wmcs and click licensing and double-click Authentication…

29 – Right-click Anonymous Authentication and click Enable, then close IIS Manager…

** You must sign out before you can manage AD RMS…
Next, lets configure AD RMS super users group for SVR01…
30 – In Server Manager, click Tools, and then click Active Directory Rights Management Services…

31 – In the Active Directory Rights Management Services console, expand the SVR01 node, and then click Security Policies…

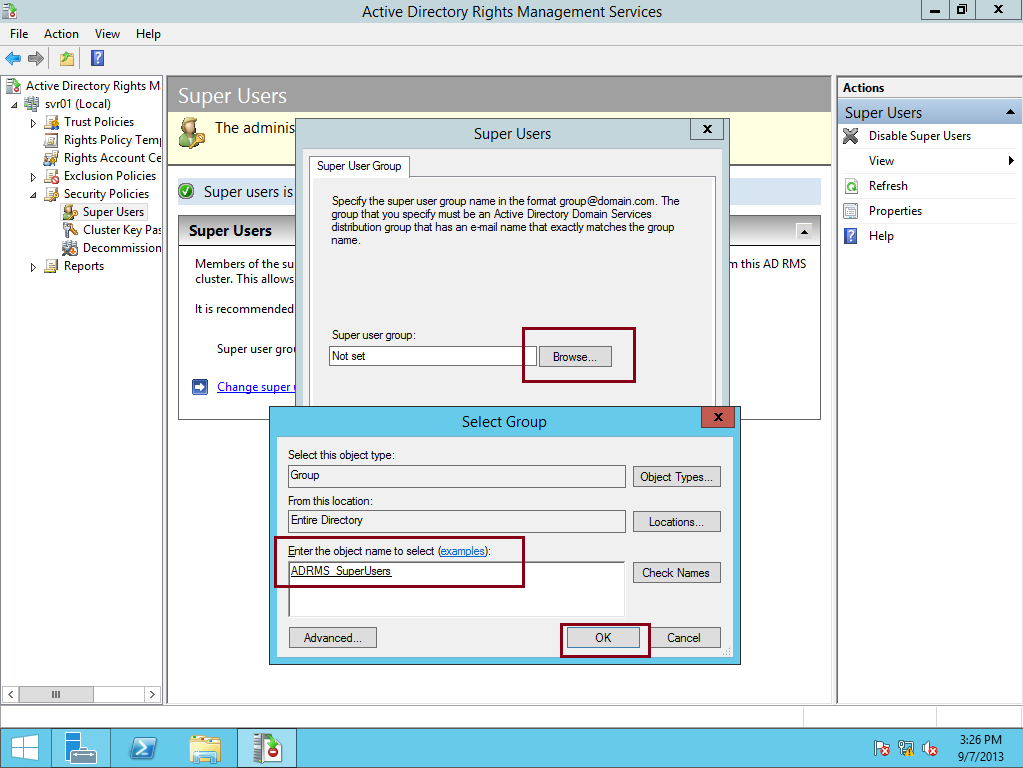
32 – In the Security Policies area, under Super Users, click Change super user group…

33 – In the Super Users box, in the Super user group text box,type ADRMS_Superusers@comsys.local, and then click OK…

Orait guyz.. we done for now.. anyway we still have long way to go to setup & configure our ADRMS Server…
Wait for my next post on ADRMS rights policy template configuration…
Windows System Administrator : Installing And Configuring Ad Rms In Windows Server 2012 R2 – Part 1 >>>>> Download Now
ReplyDelete>>>>> Download Full
Windows System Administrator : Installing And Configuring Ad Rms In Windows Server 2012 R2 – Part 1 >>>>> Download LINK
>>>>> Download Now
Windows System Administrator : Installing And Configuring Ad Rms In Windows Server 2012 R2 – Part 1 >>>>> Download Full
>>>>> Download LINK