In this last part of NAP, lets go through a very simple straight forward step on how to establish a VPN Connection in Windows 8.1 – In Windows 8, open Network and Sharing Center, then click Set up a new connection or network…
In this last part of NAP, lets go through a very simple straight forward step on how to establish a VPN Connection in Windows 8.1 – In Windows 8, open Network and Sharing Center, then click Set up a new connection or network…

2 – On the Choose a connection option interface, click Connect to a workplace, and then click Next…

3 – On the How do you want to connect? interface, click Use my Internet connection (VPN)…

4 – Next, click I’ll set up an Internet connection later…

5 – On the Type the Internet address to connect to interface, in the Internet address box, type 176.16.0.106 (this ip is my OSI-NPS Server which is hosted NPS services with NAP), and then click the Allow other people to use this connectioncheck box, and click Create…

6 – In the Network Connection console, right-click the OSI NPS-VPN connection, click Properties…

7 – On the OSI NPS-VPN Connection Properties, click Security tab and then under Authentication, click Use Extensible Authentication Protocol (EAP), selectMicrosoft: Protected EAP (PEAP) (encryption enabled), and then clickProperties…

8 – Make sure you clear the Verify the server’s identity by validating the certificate check box and also clear the Enable Fast Reconnect check box, and then select the Enforce Network Access Protection check box, and click OK…

9 – Next, in the Network Connections window, right-click the OSI NPS-VPN connection, and then click Connect/Disconnect.

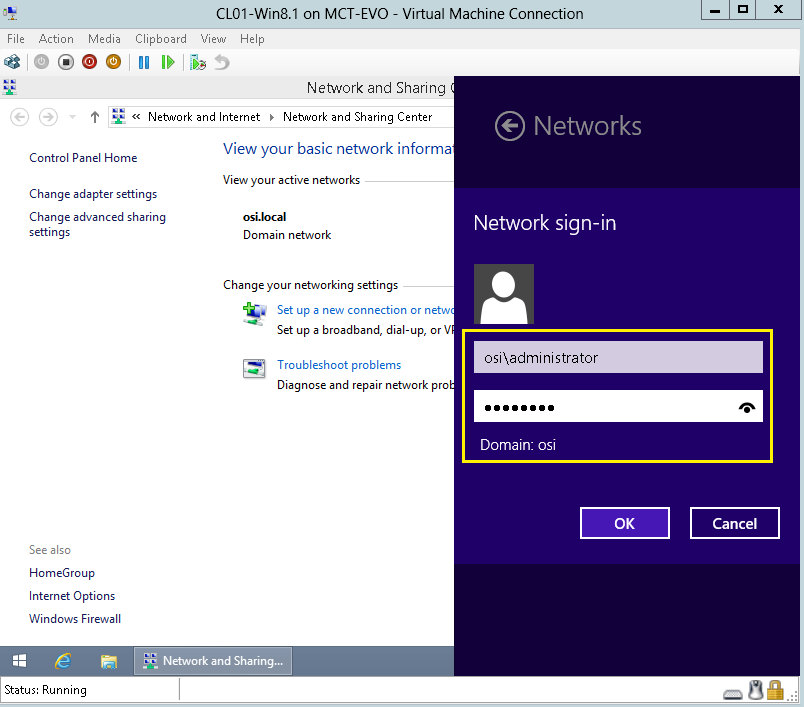
10 – In the Networks list on the right, click OSI NPS-VPN, and then click Connect, inNetwork Authentication, in the User name box, type OSI\Administrator and fill in the password and then click OK…
11 – Check your connection status, make sure it’s connected now…

12 – Next, open CMD, then type ipconfig /all, and then press Enter.
View the IP configuration.
System Quarantine State should be Not Restricted.

13 – Next, switch to OSI-NPS Server, open Network Policy Server console, then expand Network Access Protection, expand System Health Validators, expand Windows Security Health Validator, and then click Settings, in the right pane, under Name, double-click Default Configuration…

14 – In the Windows Security Health Validator interface, click Windows 8/Windows 7/WindowsVista tab, click Restrict access for clients that do not have all available security updates installed check box, and then click OK…

15 – Switch back to Windows 8, type ipconfig /all, and then press Enter.
View the IP configuration.
System Quarantine State should be Restricted.

OK, finally i complete the long journey for 7 part of NAP…
To my readers & my students, please take a moment by reading theory behind NAP in Windows Server 2012 R2, there was so many things you can explore in NAP…
Wait for my next post on the Bitlocker in Windows Server 2012 R2…

No comments:
Post a Comment