Many big company might have many GPOs with multiple IT administrators that manage them.
When an IT administrator edits a GPO, the template files are pulled from the local workstation.
The central store provides a single folder in SYSVOL that contains all of the templates required to create and edit GPOs.
So what’s the Central Store all about??
If your company has multiple IT Admin workstations, there could be potential issues when editing GPOs.
If you do not have a central store that contains the template files, then the workstation from which you are editing will use the .admx (ADMX) and .adml (ADML) files that are stored in the local PolicyDefinitons folder.
If different IT Admin workstations have different OS or are at different service pack levels, there might be differences in the ADMX and ADML files.
For example, the ADMX and ADML files that are stored on a workstation running Windows 7 with no service pack installed might not be the same as the files that are stored on a domain controller running Windows Server 2012 R2.
This could lead to administrators not seeing the same settings in a GPO.
So, the central store addresses this issue. The central store provides a single point from which IT Admin workstations can download the same ADMX and ADML files when editing a GPO.
The central store is detected automatically by Windows OS (Windows Vista or newer or Windows Server 2008 or newer).
Because of this automatic behavior, the local workstation that the IT administrator uses to perform administration always checks to see if a central store exists before loading the local ADMX and ADML files in the Group Policy Management Editor window.
When the local workstation detects a central store, it then downloads the template files from there.
In this way, there is a consistent administration experience among multiple workstations.
Enough said, no lets go through a step by step how you as IT Admin can implement & configure Central Store in Windows Server 2012 R2…
1 – Log in to your Domain Server, in my case i will be using my OSI-ADDS01 domain server…
Open C: drive, and browse to C:\Windows\SYSVOL\sysvol\osi.local\Policies, thecreate a new folder name PolicyDefinitions…

2 – Next, browse to C:\Windows\PolicyDefinitions folder, select the entire contents of the PolicyDefinitions folder and then copy all the contents…

3 – paste all the contents that you copy from previous C:\Windows\PolicyDefinitions folderinto C:\Windows\SYSVOL\sysvol\osi.local\Policies\PolicyDefinitions folder…

4 – Open Group Policy Management, right-click the Default Domain Policy, and then click Edit…
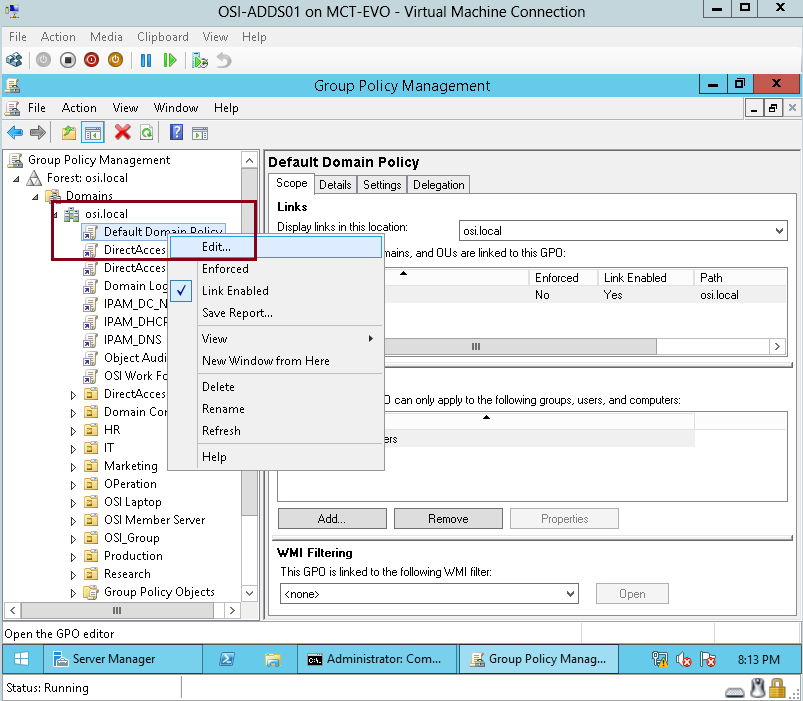
5 – In the Group Policy Management Editor interface, expand Polices, point you cursor to Administrative Templates folder and verify that it reads: “Administrative Templates: Policy definitions (ADMX files) retrieved from the central store.”

6 – next, lets create a new GPO, right-click the Starter GPOs folder, and then clickNew…

7 – In the New Starter GPO dialog box, type OSI IE Restrictions, in the Comment field, you can type any description you prefer @ follow your IT Company Security Policy, and then click OK…
*** In this demo, i will only show how to do restriction in Internet Explorer General Page, you can always spend some time to try other function that available in GPO…

8 – under the Starter GPOs folder, right-click OSI IE Restrictions GPO, and then click Edit…

9 – In the Group Policy Management Editor interface, expand User Configuration, Administrative Templates, and then click All Settings, then right-click All Settings, and then click Filter Options…

10 – In the Filter Options interface, click Enable Keyword Filters, then in the Filter for word(s) box, type General page, beside Within, untick the Help Text andComment check boxes, and lastly, beside Filter for word(s) field, click Exact, and then click OK…

11 – Double-click the Disable the General page setting…

12 – in the Disable the General page interface, click Enabled, and then click OK…

13 – Next, what we need to do is to create an IE Restrictions GPO from the OSI IE Restrictions starter GPO…
right-click the osi.local domain, and then click Create a GPO in this domain, and Link it here…

14 – In the New GPO box, type OSI HQ IE Restrictions, then under Source Starter GPO, click the drop-down box, select OSI IE Restrictions, and then click OK…

15 – Open CMD, and type gpupdate /boot /force…

16 – now lets try the GPO, log in to your client PC using any domain user profile…

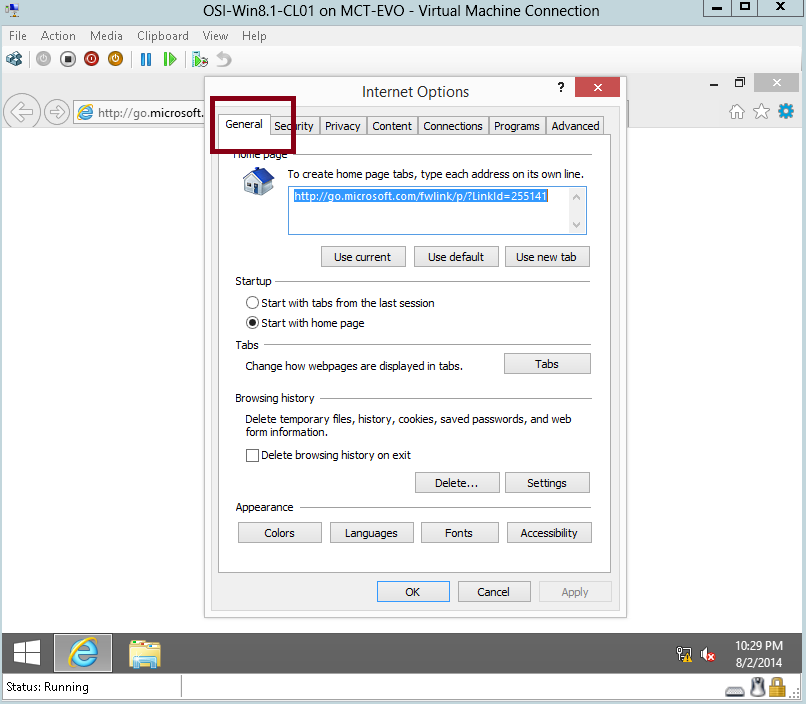
17 – Open Internet Explorer, then click setting button, and click Internet options…

18 – notice that there is no general page listed in the Internet Options interface…

19 – you can also confirm by open control panel, click Network and Internet, then under Internet Options, click Change your homepage, and then read the message box that appears informing you that this feature has been disabled, and then click OK…

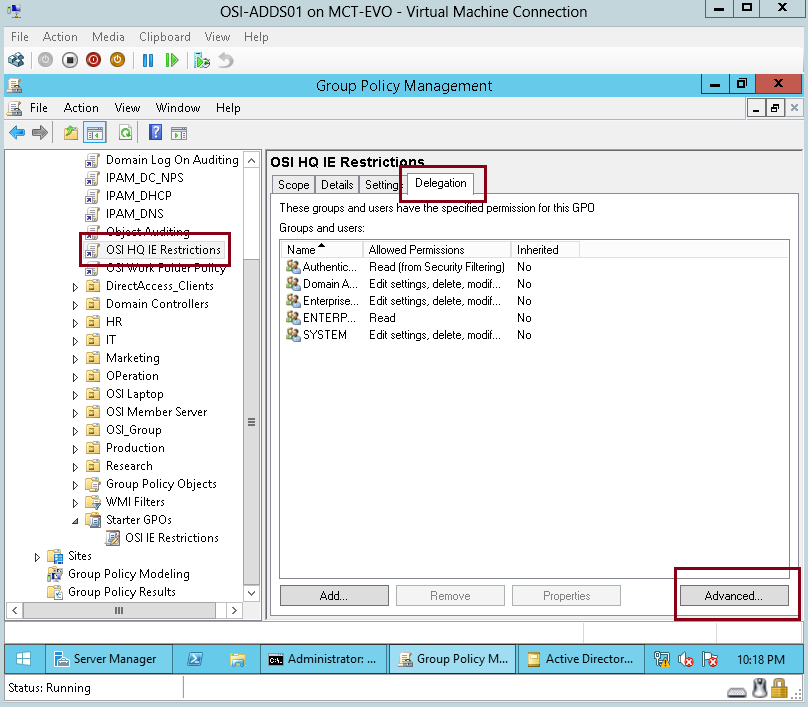
20 – now switch back to OSI-ADDS01 domain server, what i’m going to now is to use security filtering to exempt my IT Group from the OSI IE Restrictions policy…
In the GPMC, click the OSI HQ IE Restrictions policy, then click the Delegationtab, and then click Advanced button…
21 – In the OSI HQ IE Restrictions Security Settings box, click Add, and then in the Select Users, Computers, Service Accounts, or Groups interface, type IT, and then click OK…

22 – In the OSI HQ IE Restrictions Security Settings box, click the IT (OSI\IT) group, next to the Apply group policy permission, select the Deny check box, and then click OK…

23 – Click Yes in the Windows Security interface…

24 – to try the policy exemption, on the Client PC, log in as a IT user…

25 – In the IT user profile, open Internet Explorer, go to Internet Options, notice that as a IT department user, you can have your General Page in IE…
No comments:
Post a Comment